
Happy St. Patrick’s Day!
No matter where in the world you are celebrating this year, I hope you enjoy this adorable lil lucky potato named Spud! I wanted to create something unique and cute to represent this holiday’s spirit!
Why a potato you ask? There are so many interesting facts about potatoes! Did you know it was the first vegetable to be grown in space!? Maybe one day Spud will get to go to the moon. Space Spud Pattern next?
The potato can also be eaten as an entire meal itself, providing nutrition such as vitamins B6 and C, potassium , fiber, as well as protein. It is also an easier crop to grow in less than desirable conditions. This led to the potato being one of the main crops, for the middle class, in Ireland prior to the Great Famine of the 1800’s. The potato crops were destroyed by a fungus brought over by ships from the Americas, over 1 million were lost and Ireland was changed forever.
Many view St. Patrick’s day as a holiday just to drink and wear green. But I challenge you this year, with the help of Spud, to take a moment to think about the Irish people, and how they have persevered.
I hope Spud brings you lots of Luck! and inspires you to
persevere this year, with the strength of the Irish <3
Materials:
Yarn:
- I Love this Yarn! – Sungold
- I Love this Yarn! – Brown
- Paintbox Simply DK – Green Grass(129)
- Paintbox Simply DK – Ballet Pink(152)
- Paintbox Simply DK – Buttercup Yellow(122)
- Paintbox Simply DK – Pure Black(101)
- Aunt Lydia’s Classic Cotton Crochet Thread – Black
Tools:
- 3.00mm Crochet Hook
- Yarn Needle
- Scissors
Other:
Polyfil
Stitches Used
U.S. Terminology
Right Handed Instructions
| CH | Chain Stitch |
| ST | Stitch |
| SK | Skip Stitch |
| SL ST | Slip Stitch |
| SC | Single Crochet |
| SCINC | Single Crochet two in Same Stitch (Increase) |
| SC2TOG | Single Crochet two Together(Decrease) |
| FLO | Front Loop Only |
| BLO | Back Loop Only |
| * | Stitches inside asterisk are repeated |
| , | commas are used to indicate when stitches worked into one stitch slot ends. Example: 1 sc 1 dc 1sc, sl st = 1sc 1 dc 1 sc into one stitch and then 1 sl st into the next stitch. |
Special Techniques Used
Potato Body
This Piece is worked bottom up.
Using Golden tan color yarn.
| Round 1: | Create a Magic Circle , 6 sc, no join. | (6 stitches) |
| Round 2: | 6 scinc. | (12 stitches) |
| Round 3: | *1 sc, 1 scinc* repeat * to * 5 more times. | (18 stitches) |
| Round 4: | *1 scinc, 2 sc* repeat * to * 5 more times. | (24 stitches) |
| Round 5: | *3 sc, 1 scinc* repeat * to * 5 more times. | (30 stitches) |
| Round 6-9: | 30 sc. | (30 stitches) |
| Round 10: | *4 sc, 1 sc2tog, 4 sc* repeat * to * 2 more times. | (27 stitches) |
| Round 11: | *7 sc, 1 sc2tog* repeat * to * 2 more times. | (24 stitches) |
| Round 12: | 24 sc. | (24 stitches) |
| Round 13: | *7 sc, scinc* repeat * to * 2 more times. | (27 stitches) |
| Round 14: | *4 sc, 1 scinc, 4 sc* repeat * to * 2 more times. | (30 stitches) |
| Round 15: | 30 sc. | (30 stitches) |
| Round 16: | *3 sc, 1 sc2tog* repeat * to * 5 more times. | (24 stitches) |
| Round 17: | *1 sc, 1 sc2tog, 1 sc* repeat * to * 5 more times. | (18 stitches) |
Before continuing to Round 18, Add 9.00mm Safety Eyes between Rounds 13 and 14. Using the light pink yarn, add a small line under each eye for Spud’s blush. Create a small smile between the eyes using the black crochet thread.
Begin Stuffing your peanut firmly, but do not overstuff. You should not be able to see the stuffing through the stitches.
| Round 18: | *1 sc, 1 sc2tog* repeat * to * 5 more times. | (12 stitches) |
| Round 19: | 6 sc2tog. | (6 stitches) |
Finish stuffing and tie off, Use the Amigurumi Close Method


Potato Spots
Big Spots
Using Brown Yarn.
| Round 1: | Create a Magic Circle , 6 sc, no join. | (6 stitches) |
Tie off leaving a tail for sewing onto the spud.
Small Spots
Using Brown Yarn.
| Round 1: | Create a Magic Circle , 4 sc, no join. | (4 stitches) |
Tie off leaving a tail for sewing onto the spud.
Sew Spots on your spud in any location you like. I personally made 2 of each side; placing 2 small and 1 big spot in a cluster on the front right side bottom, and 1 big spot on the front top left side. See Pictures.
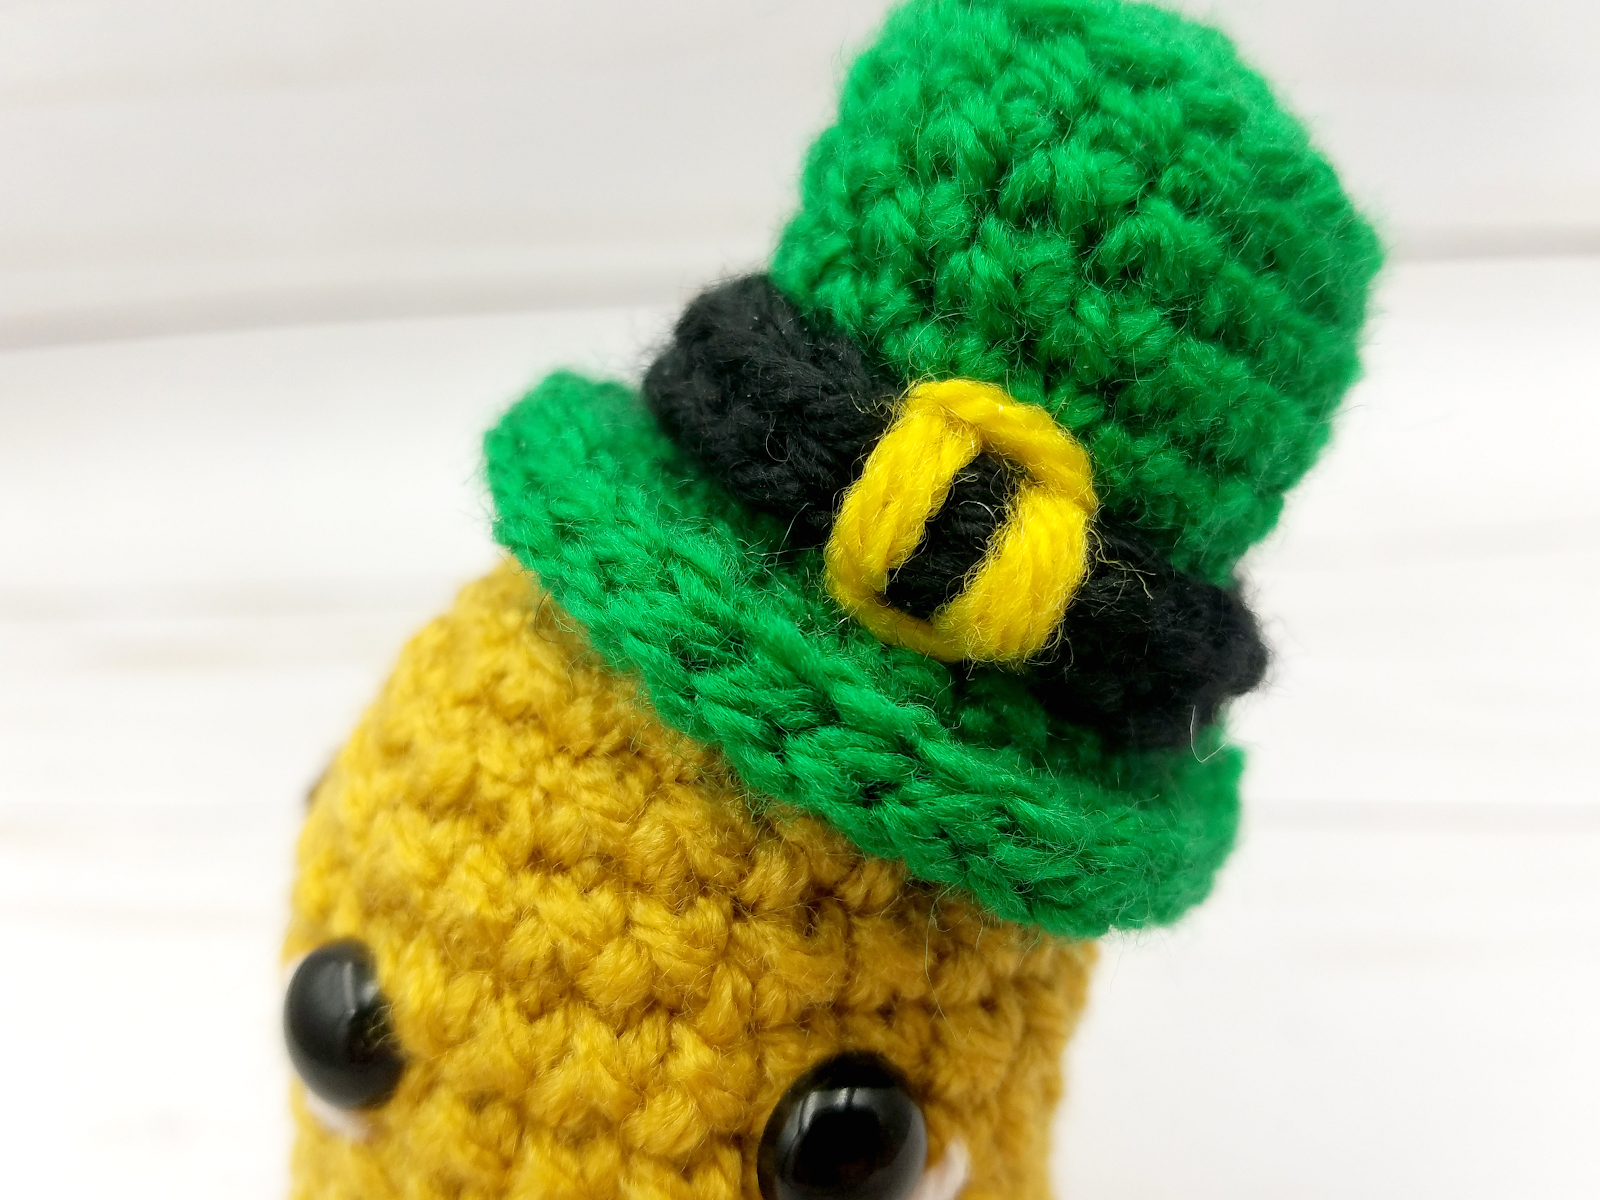
Leprechaun Hat
Using Green yarn.
| Round 1: | Create a Magic Circle , 6 sc, no join. | (6 stitches) |
| Round 2: | 6 scinc. | (12 stitches) |
| Round 3: | *1 sc, 1 scinc* repeat * to * 5 more times. Join. | (18 stitches) |
| Round 4: | Ch 1, 18 sc BLO, no join. | (18 stitches) |
| Rounds 5-7: | 18 sc | (18 stitches) |
| Round 8: | 18 sc, join. | (18 stitches) |
| Round 9: | Ch 1, *2 sc flo, 1 scinc flo* repeat * to * 5 more times, join. | (24 stitches) |
| Round 10: | Ch 1, *1 sc, 1 scinc, 1 sc* repeat * to * 5 more times, join. | (30 stitches) |
| Round 11: | 30 sl st. | (30 stitches) |
Tie Off and set aside.
Hat Belt
| Row 1: | Ch 25, 1 sc in 2nd ch from hook, 24 sc. | (25 stitches) |
Tie off and sew around the hat right above the brim.. Using the yellow yarn create a small square over the belt to act as the buckle. See Picture.
Finishing the Hat
Option 1: Perfect if you will be sewing the hat onto the potato. Begin sewing the hat to the head of the potato spud using the Amigurumi Piece Join Method, stuff before sewing completely on.
Option 2: This option is good if you would rather the hat be stuffed before sewing to the potato, or if you want the hat to be able to be its own separate piece.
Attach green yarn to the blo of a stitch from Round 9 of the hat.
| Round 1: | 18 sc blo, join. | (18 stitches) |
| Round 2: | *1 sc, 1 sc2tog* repeat * to * 5 more times, join. Stuff Hat. | (12 stitches) |
| Round 3: | 6 sc2tog, join. | (6 stitches) |
Use the Amigurumi Close Method to close hat. Sew to Potato if you wish using the Amigurumi Piece Join Method
Thank you for choosing my pattern!


This pattern and all information contained in this post is the property of Tiffany Horton. You have permission to sell any finished product created using this pattern, a link back to this pattern is appreciated. The information contained in this post (the pattern, media,etc) may not be copied, reproduced, distributed, or shared in anyway. Rewriting, reselling, distributing, or copying this pattern electronically, verbally, written or otherwise, including translations, is prohibited.
Socials
| Website | www.cafedelcraft.com |
| @cafedelcraft | |
| @cafedelcraft | |
| https://www.pinterest.com/cafedelcraft/ | |
| Ravelry | https://www.ravelry.com/designers/tiffany-horton |